Grilled Halloumi Secrets: Achieve the Perfect Sear & Texture for Your Salad
The sizzle, the aroma, the tantalizing sight of golden-brown cheese kissed by fire – there's something uniquely satisfying about perfectly grilled halloumi. This resilient, salty cheese has earned its place as a culinary star, especially when forming the centerpiece of a vibrant Minute Halloumi Salad: Sweet, Savory & Perfectly Balanced. But achieving that ideal exterior crust while maintaining a soft, slightly chewy interior isn't just about throwing it on the grill; it's an art rooted in understanding the cheese and mastering a few critical techniques. Let's unlock the secrets to grilling halloumi that will elevate any dish, particularly a refreshing halloumi salad.
The Halloumi Advantage: Why This Cheese Grills So Well
Unlike many other cheeses that would simply melt into an unmanageable puddle under high heat, halloumi stands firm. Hailing from Cyprus, this semi-hard, unripened brined cheese boasts an exceptionally high melting point. This unique characteristic is its superpower, allowing it to develop a magnificent golden-brown crust and distinct grill marks without losing its structural integrity. As the exterior crisps, a salty, slightly nutty flavor intensifies, while the inside transforms into a warm, soft, and satisfyingly creamy texture. It's this beautiful contrast that makes halloumi a dream ingredient for grilling, offering a robust foundation that can hold its own against a medley of fresh ingredients in a Halloumi Salad Guide: Healthy Meals & Flavorful Seasonal Twists.
Mastering the Prep: Slicing and Drying for Success
The journey to perfectly grilled halloumi begins long before it touches the heat. Meticulous preparation is the bedrock of a flawless sear and optimal texture.
Precision Slicing: The ½-inch Rule
The thickness of your halloumi slices is not merely a suggestion; it's a critical factor in achieving culinary perfection. Aim for uniform ½-inch thick pieces. This specific dimension ensures several key benefits:
- Even Cooking: Consistency in thickness guarantees that each piece will cook at the same rate. This means no undercooked centers or overly rubbery edges.
- Optimal Texture Balance: A ½-inch slice allows sufficient time for the exterior to develop that coveted golden, crispy crust while preserving a soft, slightly chewy interior. Thinner slices (less than ½-inch) risk cooking too quickly, leading to a tough, rubbery texture. Conversely, thicker slices may not cook through evenly, leaving a cold or undercooked core.
- Structural Integrity: This thickness provides enough substance for the halloumi to hold up beautifully on the grill without crumbling.
To achieve this precision, place your halloumi block on a clean cutting board and use a sharp knife. For those who crave ultimate consistency, a kitchen scale can be a helpful tool; aim for slices weighing approximately 1 ounce each. This attention to detail will not only improve the cooking process but also contribute to a more polished presentation, especially when serving a vibrant halloumi salad to guests.
The Critical Dry: Patting Away Moisture
This is arguably the most overlooked yet essential step in preparing halloumi for grilling. Halloumi naturally has a high moisture content, and if that surface moisture isn't removed, it will steam rather than sear. Steaming prevents the caramelization process, resulting in a soggy, less flavorful exterior instead of a crispy, golden crust.
Here’s how to do it right:
- After slicing, lay the halloumi pieces on a few layers of paper towels.
- Gently but firmly press more paper towels on top of the slices, absorbing as much surface moisture as possible.
- Repeat this process, perhaps even flipping the slices and using fresh paper towels, until they feel significantly drier to the touch.
This simple act promotes direct contact between the cheese and the heat source, allowing the Maillard reaction (the chemical process responsible for browning and enhanced flavor) to occur. The result? A richer, saltier, nuttier flavor and that irresistible crispy crust that truly shines in a grilled halloumi salad.
The Patience Principle: Resting for Perfection
Once sliced and dried, resist the urge to immediately throw the halloumi onto the grill. Allowing the sliced and dried halloumi to sit at room temperature for 10-15 minutes offers further advantages:
- Even Temperature: Bringing the cheese closer to room temperature helps it cook more evenly from edge to center.
- Reduced Sticking: A slight temperature adjustment can reduce the likelihood of the halloumi sticking to the grill grates or pan.
- Residual Moisture Release: During this resting period, any remaining internal moisture may wick out. Arranging the slices on a tray lined with fresh paper towels will catch this, ensuring maximum dryness before grilling.
Patience truly pays off here, setting the stage for a truly flawless grilling experience and a stellar halloumi salad.
Grilling Gold: Achieving the Perfect Sear
With your halloumi perfectly prepped, it's time to introduce it to the heat. This stage is all about control and timing to achieve that coveted golden perfection.
Temperature Matters: Heat Control for the Best Crust
Whether you’re using an outdoor grill, a grill pan, or a cast-iron skillet, medium-high heat is your best friend. This temperature is hot enough to create a beautiful sear without burning the cheese. Ensure your cooking surface is thoroughly preheated before placing the halloumi. You should hear a distinct sizzle when the cheese hits the pan or grates – a clear sign that your surface is ready to caramelize.
Oil and Surface Prep: Non-Stick Mastery
While halloumi doesn't melt, it can still stick. To prevent this, lightly brush each side of your dried halloumi slices with a neutral-flavored oil like olive oil or avocado oil. Avoid overly oiling the pan or grill directly, as this can lead to excessive smoke or flare-ups. For grill grates, ensure they are clean and well-seasoned. If using a cast iron pan, its natural non-stick properties when seasoned correctly, combined with high heat, will give you an unparalleled sear.
The Flip Factor: Timing is Everything
Once the halloumi hits the hot surface, resist the urge to move it immediately. Allow it to cook undisturbed for 2-4 minutes per side. You're looking for a rich, golden-brown color and distinct grill marks. The exact time will vary based on your heat source and desired level of crust. Once you see that beautiful sear, use tongs to carefully flip the pieces. Avoid excessive flipping, as this disrupts the crust formation process. Cook for another 2-4 minutes on the second side until evenly golden and perfectly seared.
The moment they achieve that gorgeous, irresistible sear, remove them from the heat. Overcooking will lead to a tougher, rubbery texture, diminishing the delightful contrast between the crispy exterior and soft interior that makes grilled halloumi so special.
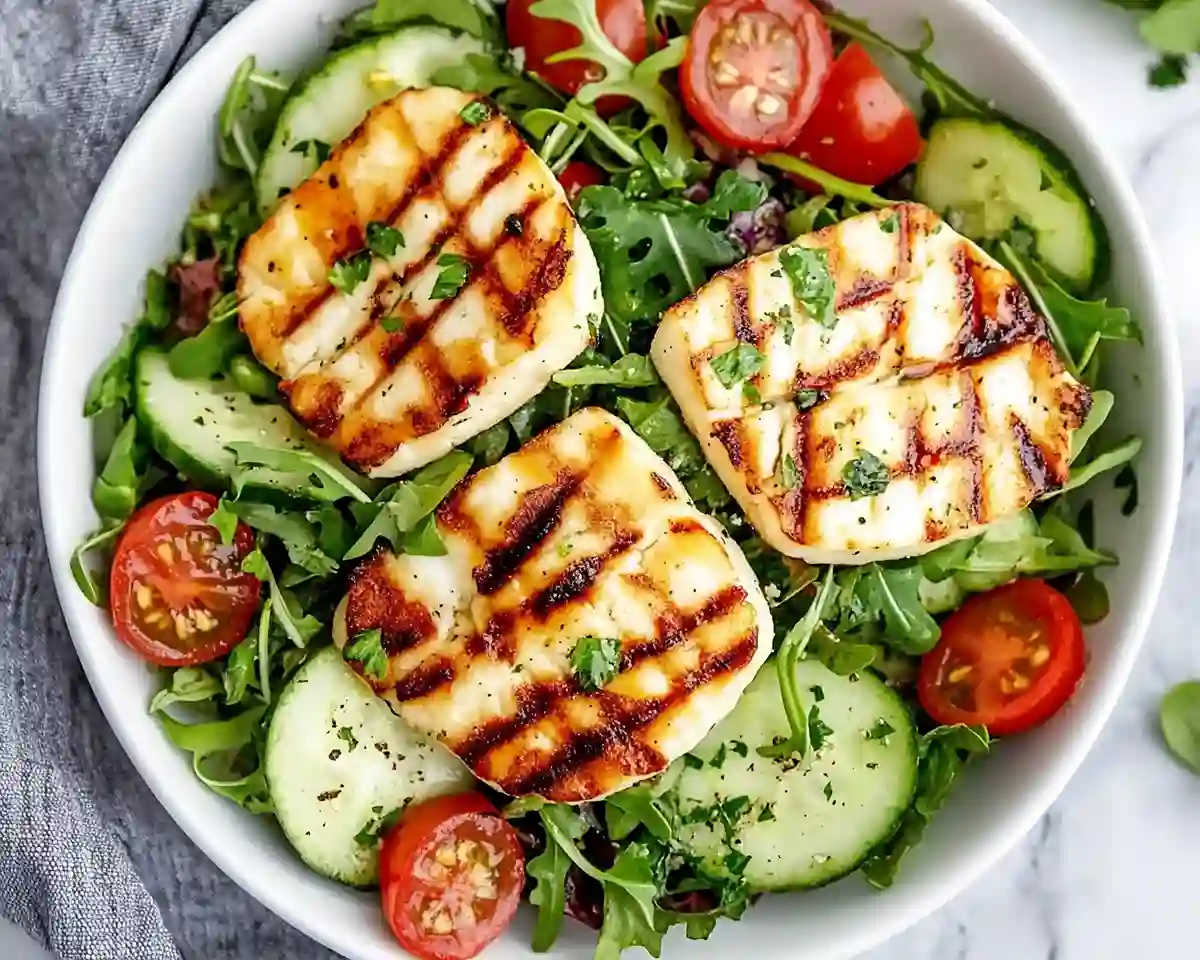
Beyond the Grill: Building Your Perfect Halloumi Salad
Once your halloumi is grilled to perfection, it’s ready to be the star of an unforgettable halloumi salad. The beauty of this dish lies in its versatility and the harmonious balance of flavors and textures it offers.
Flavor Harmony: Sweet, Savory, and Tangy
A truly exceptional halloumi salad offers a delightful interplay of tastes. The rich, salty notes of the grilled halloumi provide a robust foundation, which can be beautifully complemented by:
- Sweetness: Think warm, soft, and buttery dates, juicy summer peaches, or crisp apple slices in colder months. These add a delightful counterpoint to the halloumi's salinity.
- Savory & Peppery: Fresh, peppery arugula or mixed greens provide a vibrant, earthy base. Toasted almonds or walnuts bring a nutty depth and crunch.
- Tangy Brightness: A light honey-Dijon vinaigrette, as suggested in the reference, ties everything together with a perfect balance of acidity and sweetness. A squeeze of fresh lemon juice, a drizzle of balsamic glaze, or briny olives can also introduce that crucial tang. For more ideas on how to achieve this balance, check out our guide on Minute Halloumi Salad: Sweet, Savory & Perfectly Balanced.
Textural Delight: Crunch, Cream, and Chew
A great halloumi salad is a feast for the senses, offering a symphony of textures. The crispy, golden exterior of the halloumi gives way to a creamy, chewy interior. This can be enhanced by:
- Fresh Crispness: Cherry tomatoes, cucumbers, bell peppers, or thinly sliced red onion add refreshing crunch.
- Soft & Chewy: The dates mentioned earlier contribute a wonderful soft chewiness.
- Nutty Crunch: Toasted nuts, croutons, or even crispy chickpeas can add another layer of satisfying crunch.
Seasonal Sensations and Hearty Additions
Adaptability is a hallmark of the halloumi salad. Embrace seasonal produce to keep your salad fresh and exciting year-round. Beyond peaches and apples, consider roasted root vegetables in fall or fresh berries in spring. To transform your salad into a heartier, more substantial meal, integrate cooked grains like fluffy quinoa, fragrant cilantro rice, or hearty farro. For a comprehensive look at how to customize your salad for any occasion, our Halloumi Salad Guide: Healthy Meals & Flavorful Seasonal Twists offers even more inspiration.
Achieving the perfect sear and texture on your grilled halloumi is a rewarding culinary endeavor that can elevate a simple salad into an extraordinary meal. By understanding the unique properties of this remarkable cheese and meticulously following the steps – from precision slicing and critical drying to mastering heat control and timing – you'll consistently create halloumi that is golden, crispy, and utterly delicious. Whether enjoyed as a light lunch, a satisfying side, or the star of a vibrant, flavor-packed halloumi salad, these secrets will ensure every bite is a testament to perfectly grilled perfection.
